Creating and Using Action Queries

If you need to make changes to records or move a group of records in MS Access, you may want to use an action query. This article explains what an action query is, as well as one of the four basic types of action queries.
The Employees table
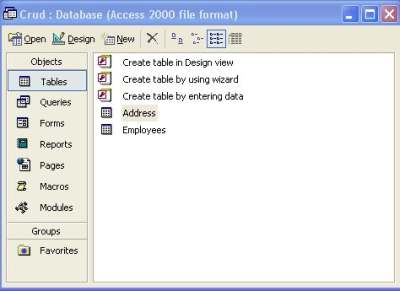
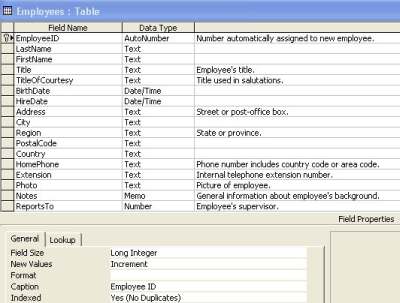
In order to look at action queries, a new mdb file was created called CRUD. The Employees table from the Northwind database was imported into this file. This is easily done by following the File-->Get External Data-->Import .. command string. The design view of this table is shown in the next picture. This will be the starting point for this tutorial. From this table we will create a new table using the Make Table action query.
The Make Table query
This action query takes a table or a a number of tables and, using the data from them, creates a new table. In this way you can create a table that can be exported to a new Microsoft database, or set up an archive of important data. The make table query results in the creation of a view of the table that contains a subset of the columns in the table. In the example that follows a make table query will be created. The query will create and populate a table that has only the address information of the employees.
We can start with a Select query. After making the selections and applying conditions for filtering, if any, we can convert it into a make table query. The following design view of a Select query shows the six fields that are to be included in the table, named Address. We will use an expression to create a field which has the full name in one column using two of the fields from this query.
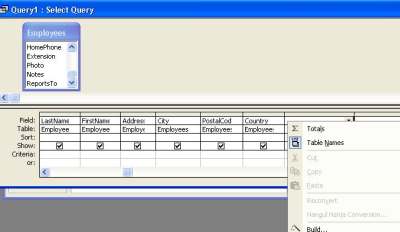
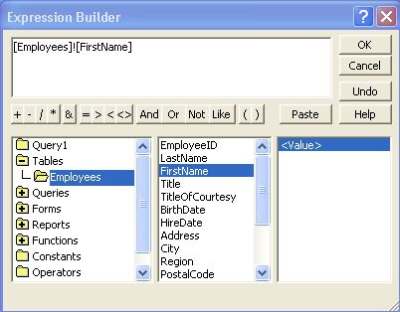
Here a table called Address will be created from the data in the Employees table as shown. We will be choosing the columns needed for the Address table. We will also add a column which has the First Name together with the Last Name, for which we need to build an expression. In an empty Field row in the above window, right click to bring up the context-sensitive menu. Choose Build... to bring up the Expression Builder as shown, expand the Tables node, highlight the First name, and click on Value in the highlighted area. This adds the code [Employees] ! [FirstName] to the expression as shown.
Now complete by adding a space between First Name and Last Name, and then add the Last name in a way that is similar to the way you added the First Name. Use the available buttons on the Expression builder as shown.
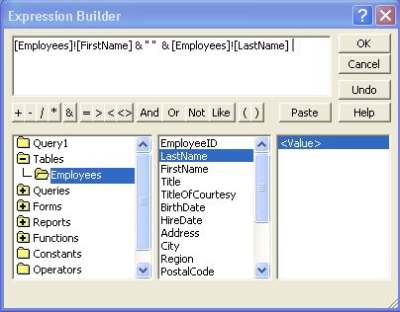
When you click on the OK button on the Expression Builder the concatenated string is added to your design view of the query as shown. The SQL view of the query is now as shown in the next paragraph. Save the query as EmployeeAddress .

SELECT Employees.EmployeeID, Employees.LastName, Employees.FirstName, Employees.Address, Employees.City, Employees.PostalCode, Employees.Country, [Employees]![FirstName] & " " & [Employees]![LastName] AS Expr1 FROM Employees;
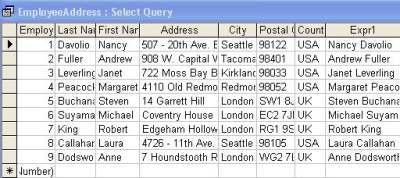
When you run this query by double-clicking the EmployeeAddress query icon you will see the following output. As you can see the last column shows the concatenated expression.
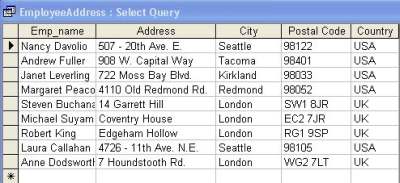
Go back to the design of the query and refine the query so that you do not choose the First Name and Last Name as shown in the SQL View (they are not included in the select list). In some versions of MS Access, when you open the query in SQL View, you may not be able to change it to the Query Design view.
SELECT Employees!FirstName & " " & Employees!LastName AS Emp_name , Employees.Address, Employees.City, Employees.PostalCode, Employees.Country FROM Employees;
The column in blue is the ' Full Name ' created by the Expression Builder. You replaced Expr1 with " Emp_name. " The output of this query is now as shown in the next picture. You have rearranged everything just as you needed.
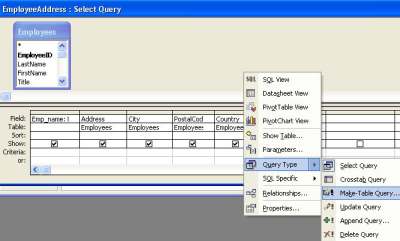
Open the EmployeeAddress query in design view as shown. Right click on an empty area by the side of the Employees table and click on the Make-Table Query... submenu item as shown.
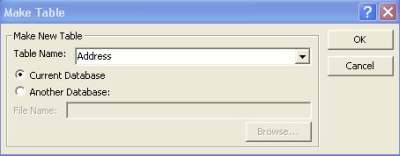
This brings up the Make Table window as shown. You have the option of creating a new table in the current database, or in another database with a name you provide. Here a table called Address will be created in the current database. Type in the name Address and click on the OK button.
This brings up the Save As dialog. Save the query under a suitable name. Here it is called the AddressQuery .
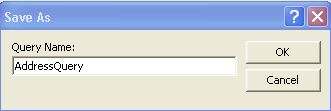
Click on the OK button to the Save query. This adds the AddressQuery to the database.
The SQLView of the MakeTable query is as shown here. This is called the Select Into statement. This will dump the selected columns into a table called Address.
SELECT Employees!FirstName & " " & Employees!LastName AS Emp_Name, Employees.Address, Employees.City, Employees.PostalCode, Employees.Country INTO Address FROM Employees;
When you click this query in the main window you will get a message from MS Access as shown.
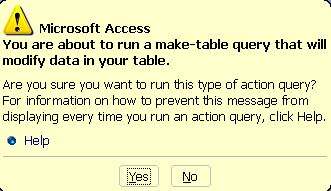
When you click on the Yes button you get another message warning you about what is going to happen, and how the action is not reversible (cannot be undone).
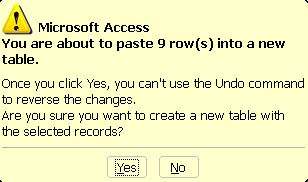
Go ahead and click on the Yes button one more time. This will create the ' Address ' table as shown in the main window of the database.